Creating sub folders in WebMail
You may want to create folders to categorise and store a section of your emails, however you can also make sub categories, here’s how:
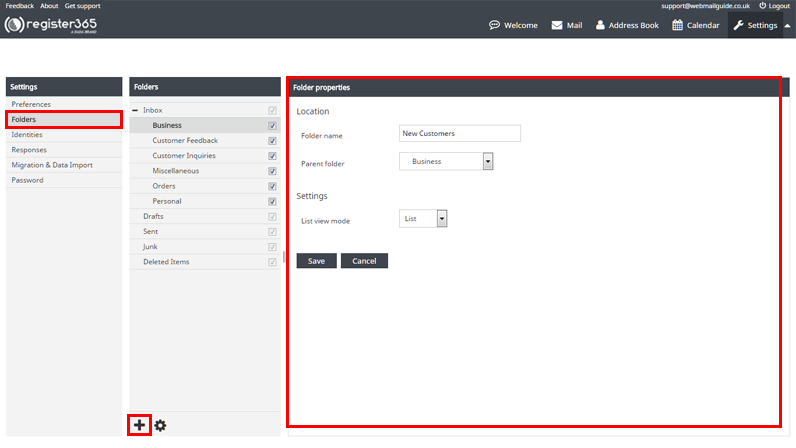
Once in the ‘Settings’ area, select ‘Folders’ from the ‘Settings’ menu on the far left hand side, from the bottom of the ‘Folders’ column, select the + or plus symbol.
In the ‘Folder Properties’ column, assign a name for the new sub folder, from the drop-down list, select the ‘Parent folder’ – the folder the sub folder should belong to, ‘List view mode’ refers to the way in which the contents of this folder are displayed, whether they are a list of Emails specified in a particular order, or if they should appear as a conversation thread.
Once you have completed these fields, press ‘Save’.
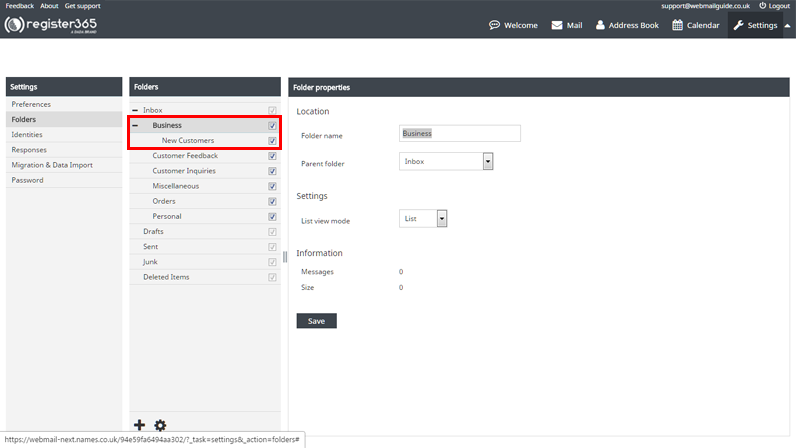
In our example the ‘New Customers’ folder was created as a sub folder of the ‘Business’ folder and will appear beneath this folder wherever in WebMail these folders appear.
You can save space in the navigation by clicking the bold – or minus symbol next to the parent folder, this will hide any sub folders beneath it, when you want these to display again, press the + or plus symbol and they will appear once again.