

How to Enable or Disable Multi-Factor Authentication (MFA) for Microsoft 365
In this article, we will show you how to enable or disable Multi-Factor Authentication (MFA) in your Microsoft 365 Admin area. MFA on Microsoft 365 adds extra security by requiring a second form of verification, like a phone notification, after entering a password. This helps protect accounts even if passwords are stolen.
Getting Started
To get started, you first need to log into your Microsoft Admin area located at https://login.microsoftonline.com/ with your Admin username and password.
How to Enable Multi-Factor Authentication
Step One
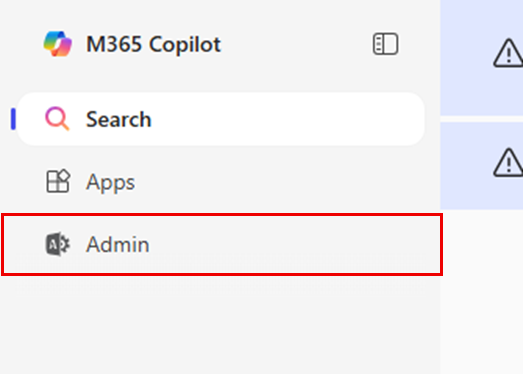
To begin, select Admin from the menu column on the left-hand side of the page.
Step Two
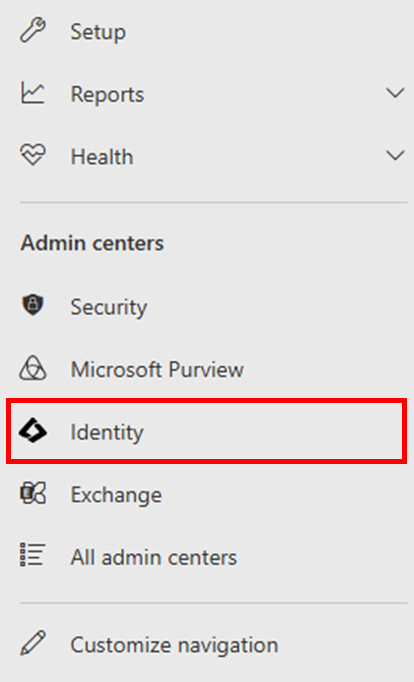
Select Identity from the menu column on the left-hand side of the page.
Step Three
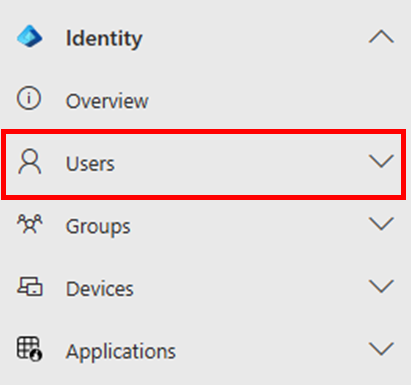
On the page you are taken to, select Identity < Users from the menu column on the left-hand side of the page.
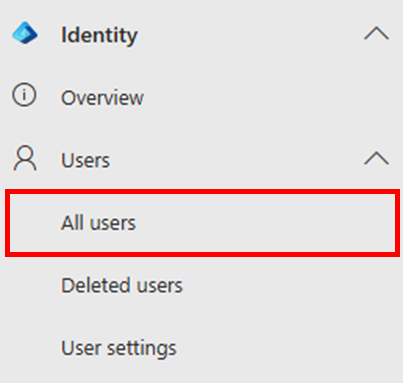
Once you have selected Users, select All users.
Step Four
Above the list of created users, select the option for Per-user MFA.

Step Five
Select the checkbox(es) next to the user(s) you wish to enable MFA for, then select Enable MFA.

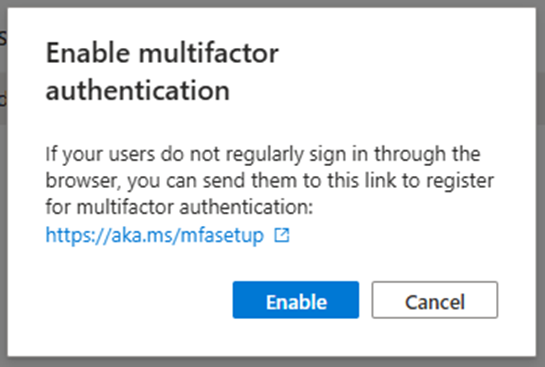
In the confirmation window that appears, select Enable.
Step Six
Select the checkbox(es) next to the same user(s), then select Enforce MFA.

In the confirmation window that appears, select Enforce.

How to Disable Multi-Factor Authentication
Disabling Multi-Factor Authentication (MFA) in the Microsoft 365 Admin Centre can be necessary in certain situations, such as when troubleshooting user access issues, migrating accounts, or simplifying login processes for a temporary period.
CAUTION: We strongly recommend keeping MFA enabled at all times for security purposes. Disabling it should only be a temporary action.
Step One
To begin, select Admin from the menu column on the left-hand side of the page.
Step Two
Select Identity from the menu column on the left-hand side of the page.
Step Three
On the page you are taken to select Identity < Users from the menu column on the left-hand side of the page.
Once you have selected Users, select All users.
Step Four
Above the list of created users, select the option for Per-user MFA.
Step Five
Select the checkbox next to the user(s) you wish to disable MFA for, then select Disable MFA.

Step Six
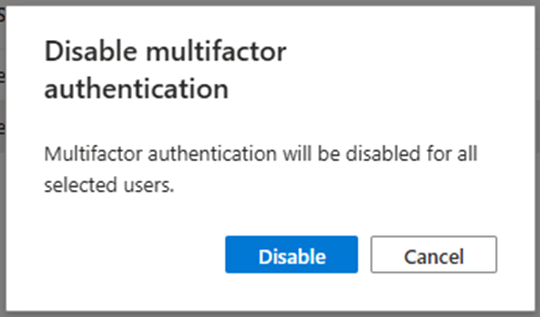
In the confirmation window that appears, select Disable.
If you have any further questions, simply raise a support request from within your Online Control Panel or call us on 01 5255768. Our Support team are here to help and ready to assist you with your enquiry.
For assistance raising a support request please follow the following guide.