

How to Create a Distribution Group
In this article, we will show you how to create a distribution group in your Microsoft 365 Admin area.
In Microsoft 365, distribution groups are used to simplify email communication by allowing users to send messages to multiple recipients at once. Instead of emailing each person individually, you can send a single message to a group email address, and it will be delivered to all members of that group. This is especially useful for departments, teams, or any set of users who need to receive the same information regularly.
Getting Started
To get started, you first need to log into your Microsoft Admin area located at https://login.microsoftonline.com/ with your Admin username and password.
TIP: Unsure where to find your Admin details? If so, please refer to our support guide HERE.
Step One
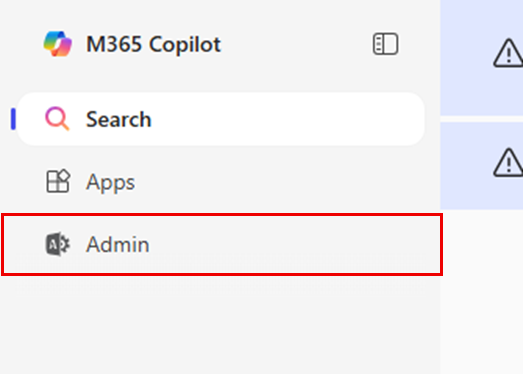
To begin, select Admin from the menu column on the left-hand side of the page.
Step Two
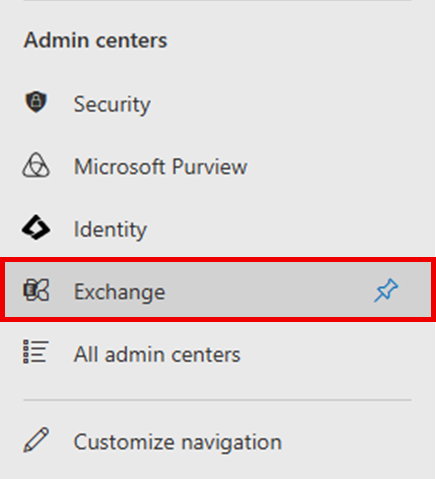
Select Show all from the menu column on the left-hand side of the page, then select Exchange.
Step Three
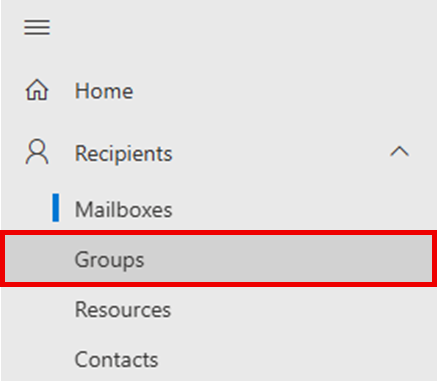
On the page you are taken to, select Recipients < Groups.
Step Four
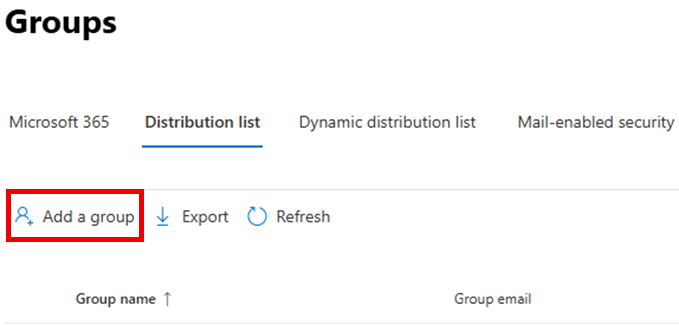
Select Distribution list.
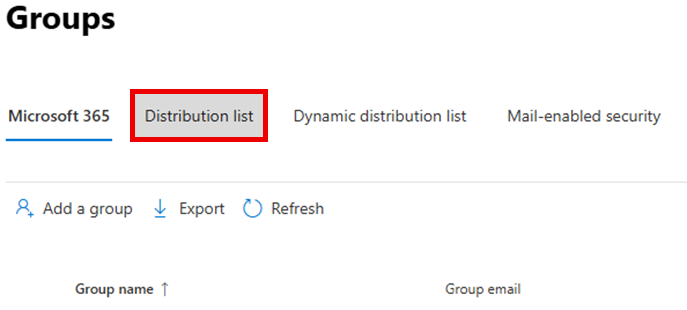
Once done, select Add a group.
Step Five
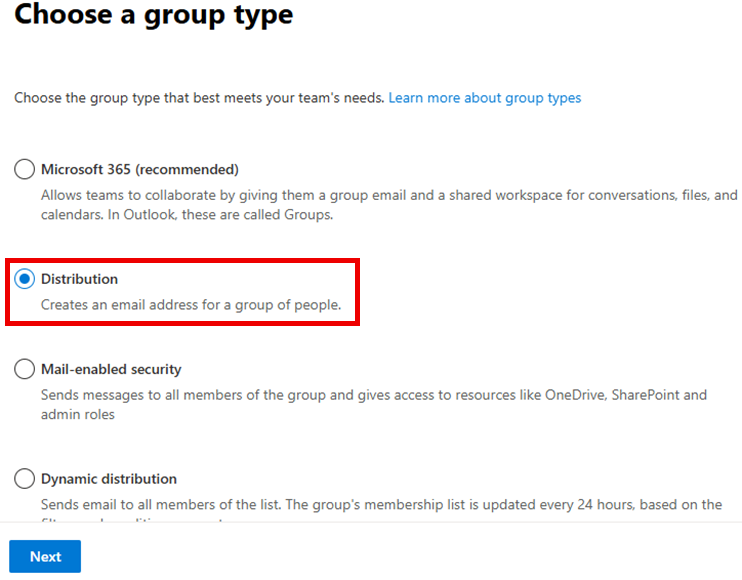
On the Choose a group type page, select Distribution.
Step Six
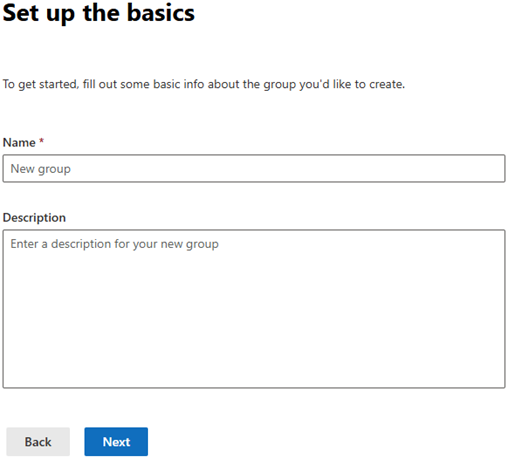
Provide a Name and Description for your group. Once done, select Next.
Step Seven
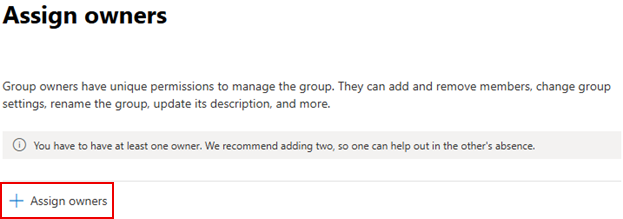
You will then need to select at least one group owner to manage the group. Click Assign owners, choose the desired user(s) in the right-hand panel that appears, then click Add.
Step Eight
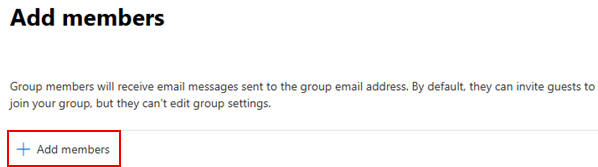
Select Add members to choose who should receive emails sent to this group address.
Choose the desired user(s) in the right-hand panel that appears, then click Add.
You will then have a chance to review and confirm the chosen members of this group. Once these have been (re)selected, click Next.
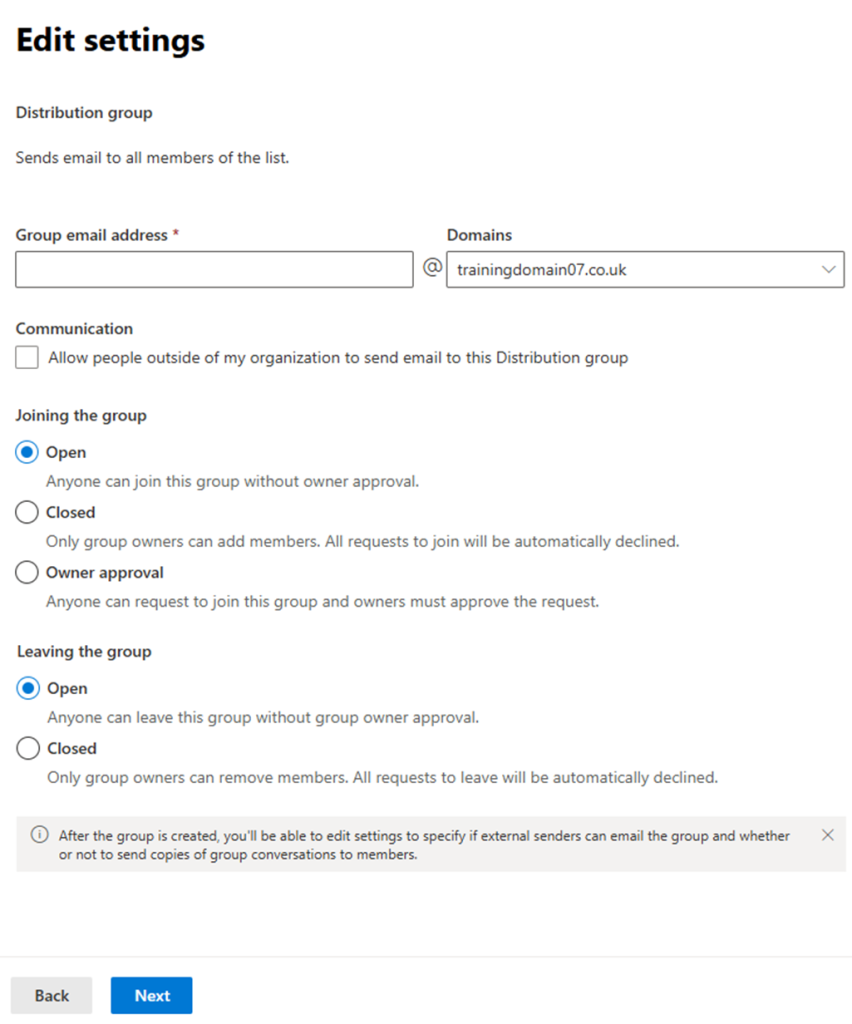
Step Nine
You will now be presented with several options regarding your distribution group:
Group Email Address
- Enter an alias that will serve as the email address used to send messages to all members of the group.
Communication
- Select whether this address should be used only within the organisation or if it can also receive emails from external senders.
Joining the group
- Choose the policy for joining this group: Open, Closed or Owner approval. Each option is accompanied by a brief description to assist you in making the most appropriate choice.
Leaving the group
- Choose the policy for leaving the group: Open or Closed. Each option is accompanied by a brief description to assist you in making the most appropriate choice.
Once you have finished, click Next at the bottom of the page.
Step Ten
The final step on the Review and finish adding group page is to check over your preferences for this distribution group. If you wish to make any changes, you can select Edit under each heading.
If you are satisfied with all of your preferences, you can finish the set up by selecting Create group at the bottom of the page.
If you have any further questions, simply raise a support request from within your Online Control Panel or call us on 01 5255768. Our Support team are here to help and ready to assist you with your enquiry.
For assistance raising a support request please follow the following guide.