

How to Create a New User in Microsoft 365
In this article, we will show you how to create a new user in your Microsoft 365 admin centre. We will outline the steps involved in entering the user’s details, assigning a license, and setting roles or permissions as needed.
Getting Started
To get started, you first need to log into your Microsoft Admin area located at https://login.microsoftonline.com/ with your Admin username and password.
TIP: Unsure where to find your Admin details? If so, please refer to our support guide HERE.
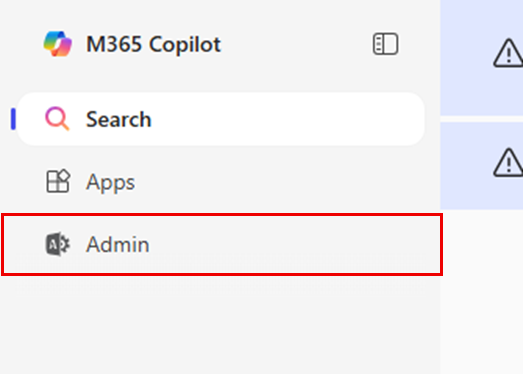
Step One
To begin, select Admin from the menu column on the left-hand side of the page.
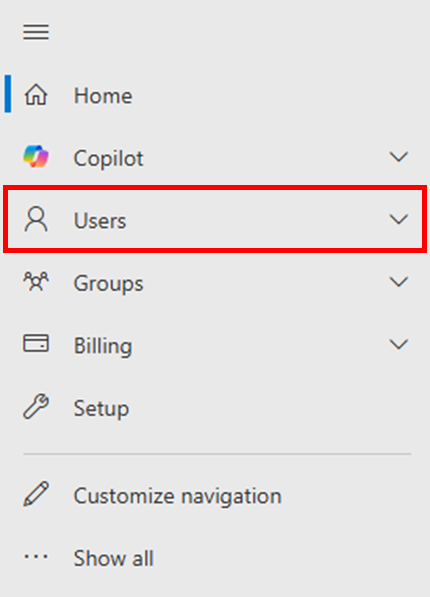
Step Two
Select Users from the menu column on the left-hand side of the page.
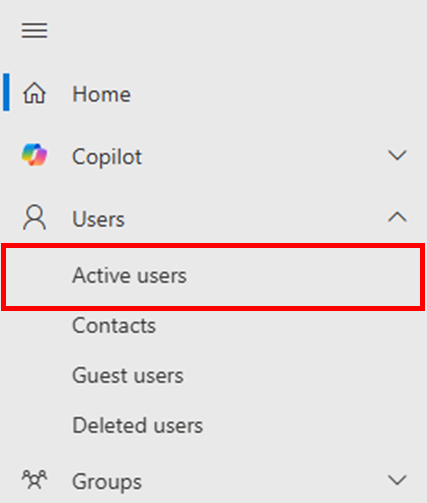
Once you have selected Users, select Active users.
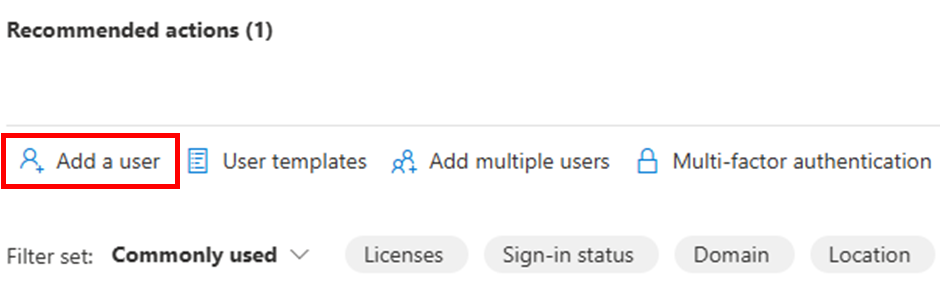
Step Three
In the Active users page, select the Add a user tab.
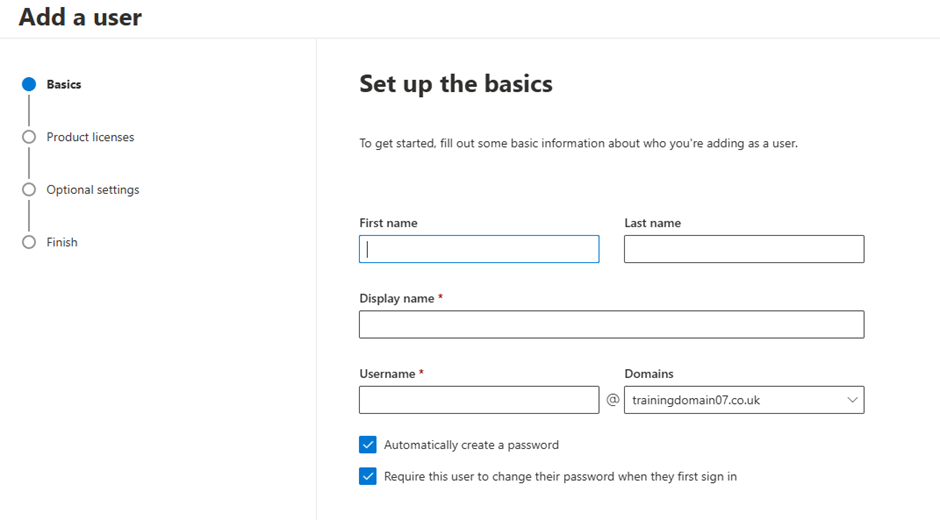
Step Four
You will now be presented with several fields to fill out:
- First name
- Last name
- Display name
- Username
- Automatically create a password
- Require this user to change their password when they first sign in
Step Five
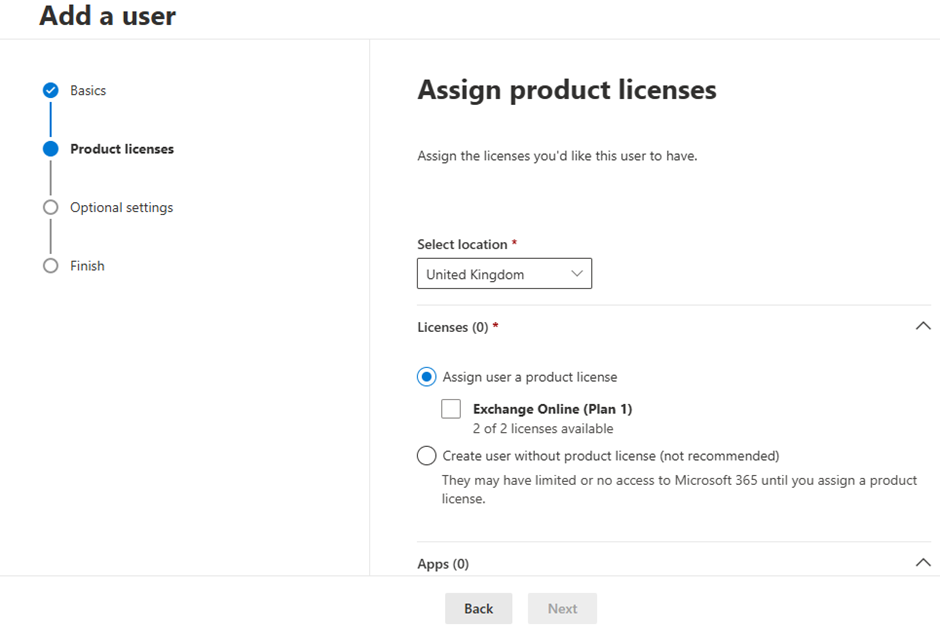
Once you have filled the details in for your new user, you will now need to assign them a product license from your list of available licenses.
TIP: If you have no more available licenses, you will need to remove a license from a current user, or you will need to purchase another license. Please upgrade your license count through your Online Control Panel or contact our Sales team on 01 5255768.
Step Six
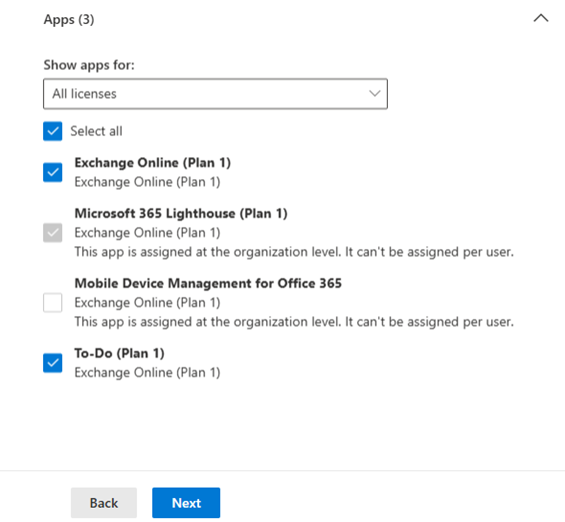
You will also be prompted to choose which Microsoft 365 apps to enable for the new user. These apps include services like Outlook, Teams, SharePoint, OneDrive, and more, depending on the license assigned. We recommend selecting all available apps to ensure the user has full access to the apps they may need. You can always adjust these settings later if needed.
Step Seven
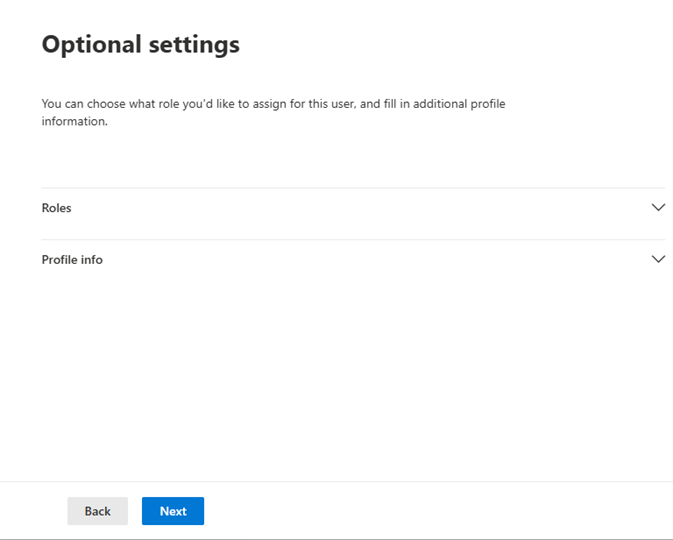
The Optional settings section allows you to configure user roles and profile information. Here, you can assign admin roles if needed and add additional details like job title, department, or office location. These settings help with user management and organisation but can be skipped or edited later.
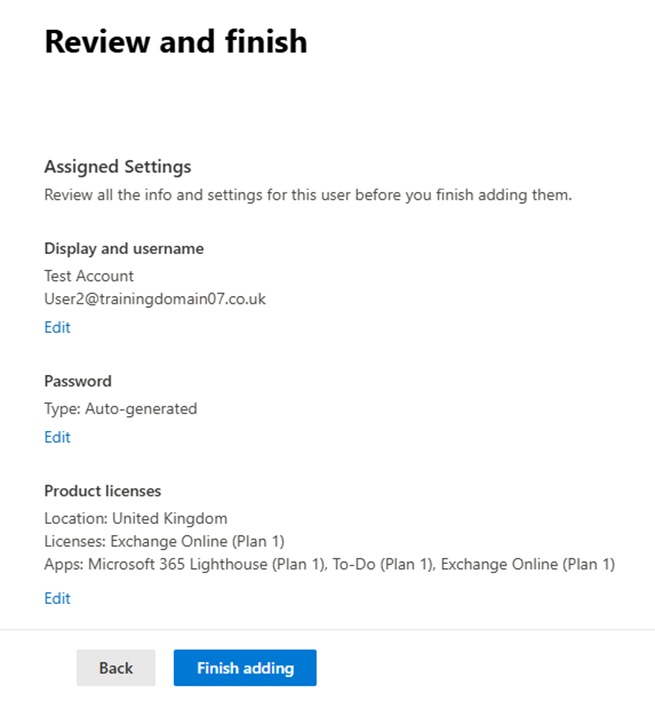
Step Eight
The penultimate step is to Review and finish the settings you have configured for this user. Once you are satisfied with them, click Finish adding.
If you have any further questions, simply raise a support request from within your Online Control Panel or call us on 01 5255768. Our Support team are here to help and ready to assist you with your enquiry.
For assistance raising a support request please follow the following guide.