Setting up LiteMail on your domain
Getting Started
This guide will walk you through the process of setting up your new email address.
In order to begin, you’ll need to ensure you have the login details for your Online Control Panel.
When you made your first purchase with us we asked you for your existing email address and to choose a password. These are the details you use to log in to your Online Control Panel.
You can get there by clicking on the Log In link in the top right corner of our website, or by going to the website address: https://login.register365.com/login/

We recommend you bookmark the login page so you can get back there easily.
If you have forgotten the password to log in here, you can click on the Forgotten password? link to reset it.
The Online Control Panel Dashboard
Once you have logged in, you should see a page that looks similar to the following:
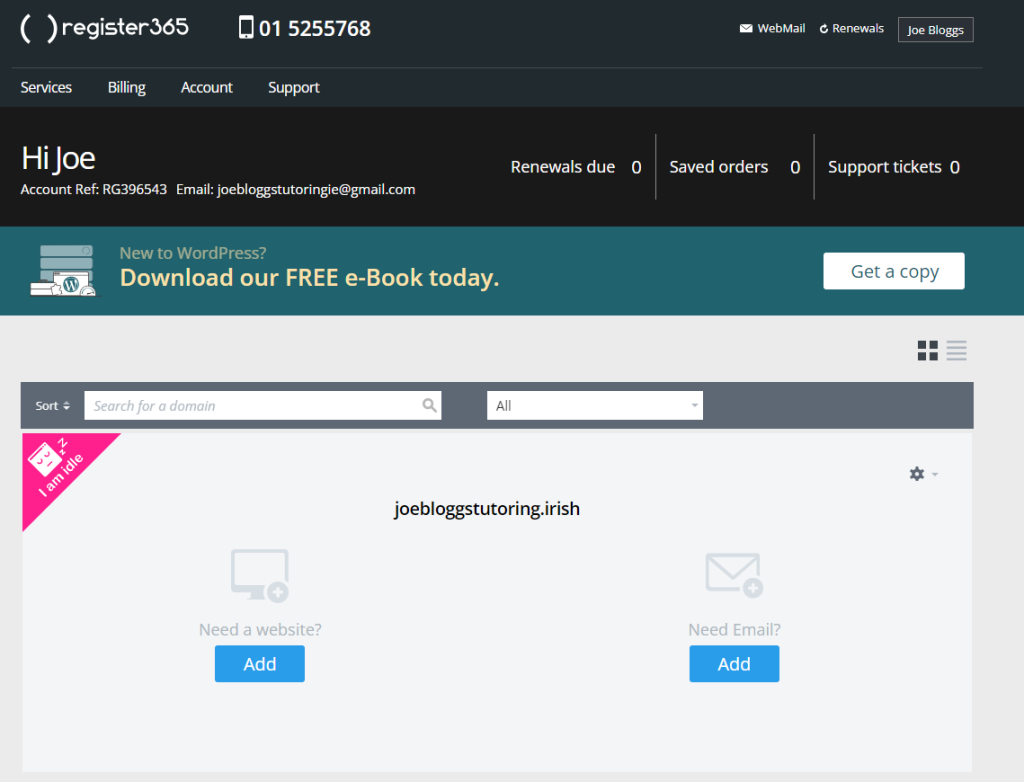
Any domain names you have registered with us are displayed in the centre of the page.
Beneath each one will be an envelope icon labelled Need Email?
Click on the blue Add button below the envelope icon.
Creating the email address
Once you’ve clicked on the Add button you should see a page similar to the one below:

Your free email address can be set up by clicking on the blue Activate Free LiteMail link at the bottom of the page.
You will then see a confirmation page asking you to enter the email address you would like to create.
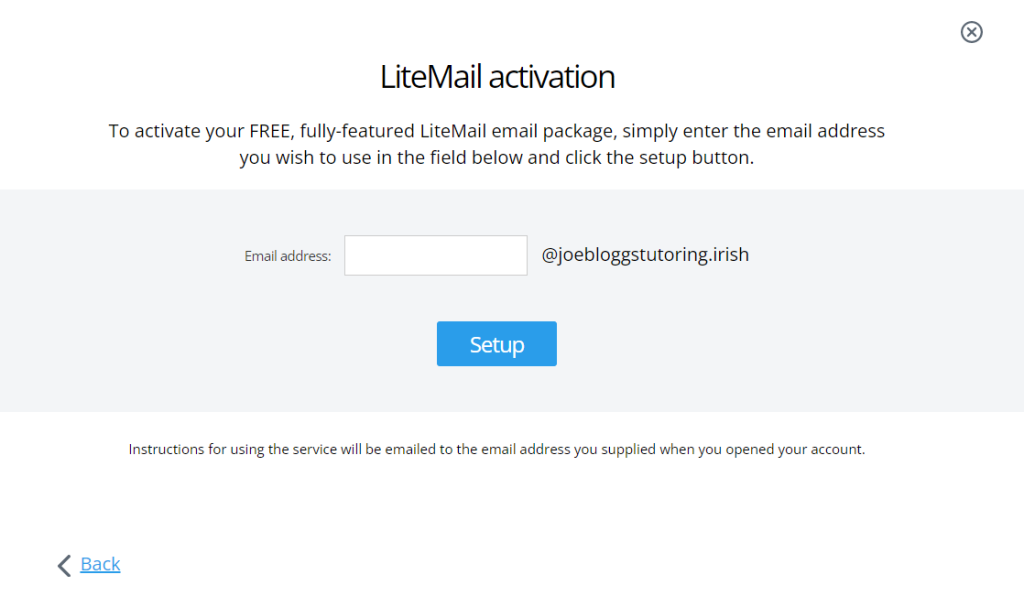
Type in the first part of your desired email address (the bit before the @ sign).
In our example, we want to create the email address info@joebloggstutoring.irish, so we are going to type info into the box.
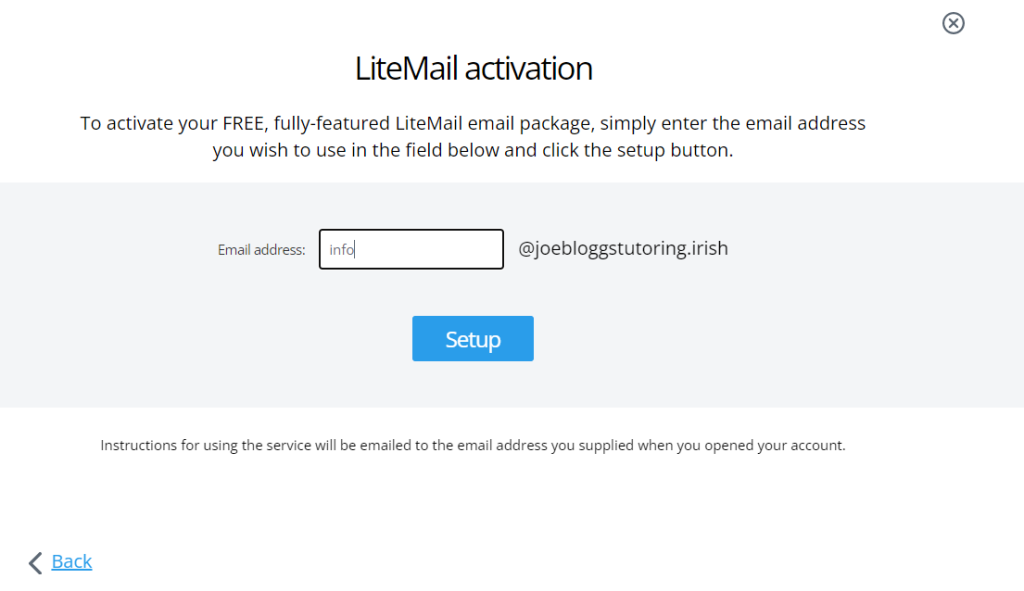
Click on the blue Setup button when you are done.
Setting the password
You should shortly receive a confirmation email to the address you provided when you created your account with us (the same email address you entered when logging into the Online Control Panel).
The last step needed is to set a password for the new email address you have just created.
This is done on the Dashboard page that you looked at earlier.
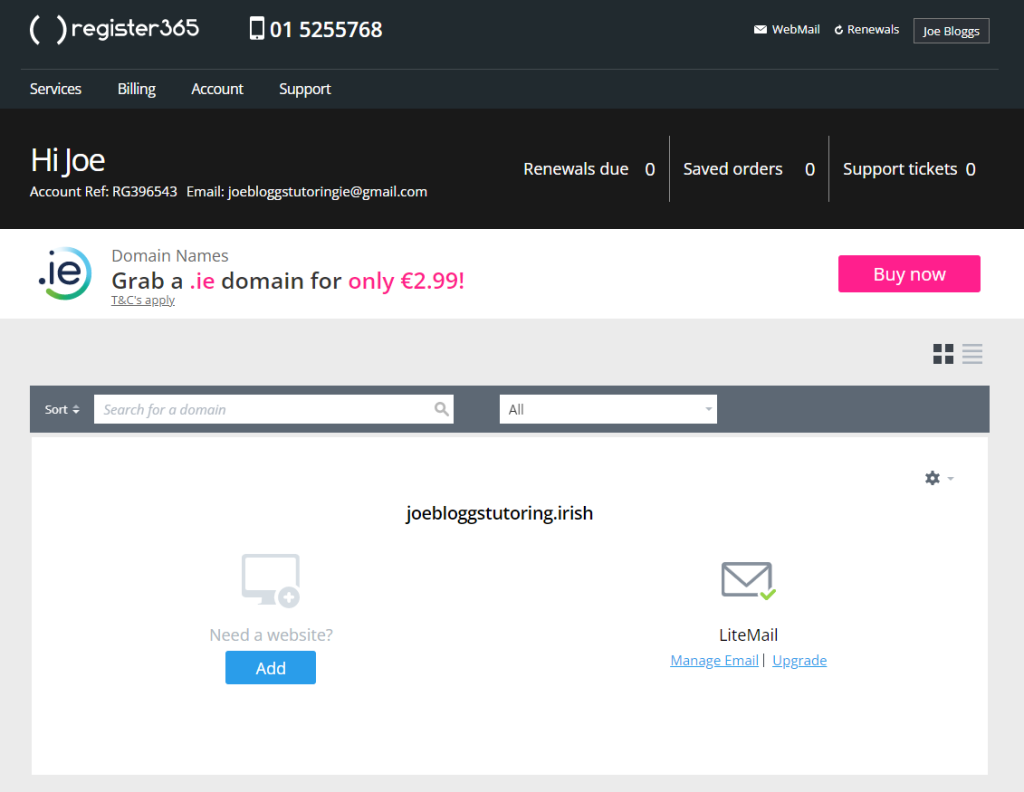
Where you had a blue Add button before, you should now see a Manage Email link instead.
Click on that and you will see a screen like the one below:
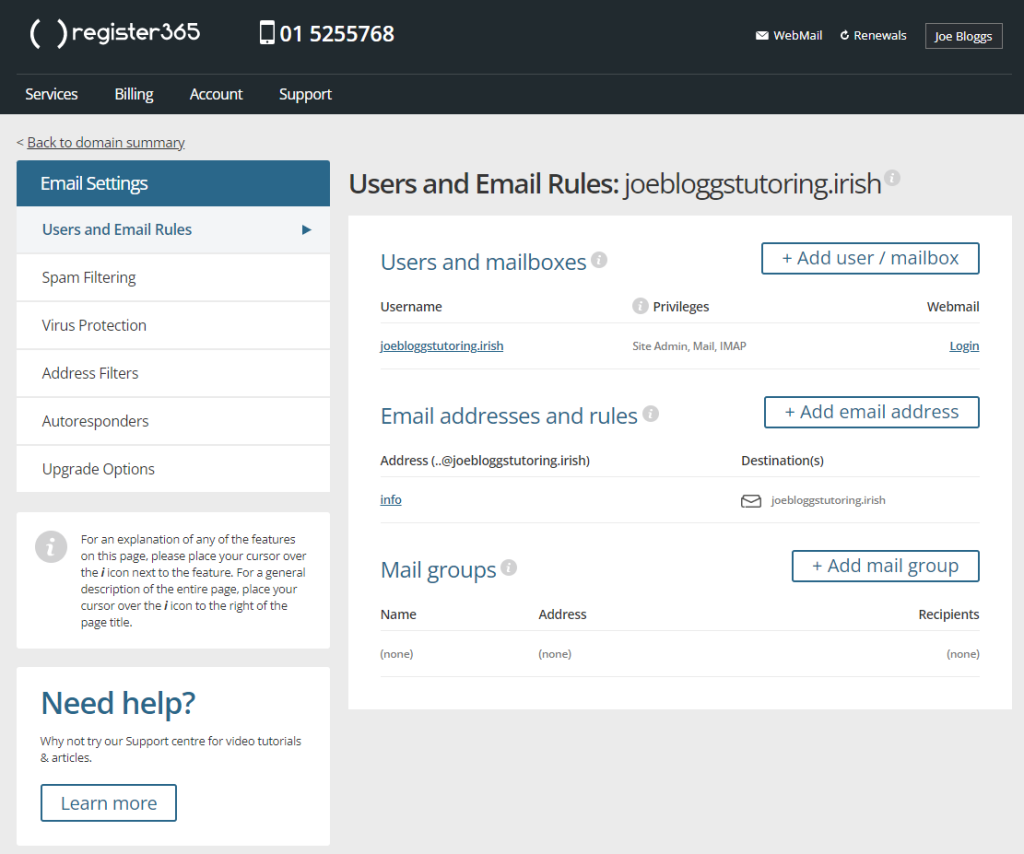
Look for the Username section at the top of the page and you should see your domain name listed there as a link that you can click on.
This will take you to a page where you can set the password for the email address.
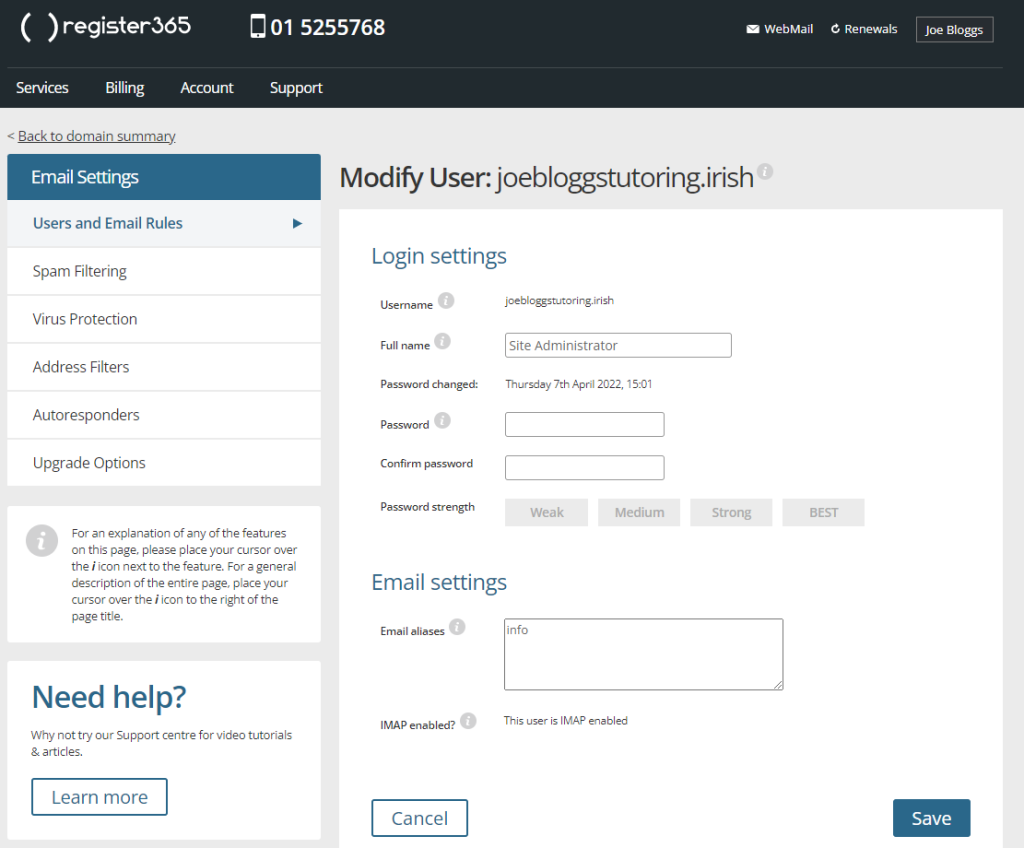
Enter the password you would like to use into the Password and Confirm password boxes.
For security reasons, the password will need to be at least 8 characters long and contain a mix of upper-case letters, lower-case letters and numbers. It also can’t be set to a word that you would find in the dictionary.
A useful tip is to think of a word you will remember and then replace some of the letters with numbers. For example an e could become a 3 and an s could become a 5.
Click the blue Save button at the bottom when you are done.
Accessing your new email address
Now that you have created the email address there are a couple of different methods you can use to access it.
- WebMail:
We have an online WebMail available at the website address:
https://webmail.register365.com/
Your username is the email address you have just created and the password is the one you set up on the previous page.
- Email App:
You can also access your emails using an email app on your computer, smartphone or tablet.
As with WebMail, the username is the full email address and the password is the new one you created. If your app asks you for a server name as well then you should use: imap.reg365.net
Note: For the best experience sending emails using an email app, we recommend purchasing our Authenticated SMTP add-on. Please get in touch with us on 01 5255768 if you wish to learn more about sending emails from your email app.
You have now completed the process of creating and accessing your new email address.
Still need help?
If you have chosen to use WebMail, you can find a number of useful guides at the website address:
https://www.register365.com/support/categories/webmail/
If you are using an email app instead, then further guidance is available at this website address:
https://www.register365.com/support/categories/imap-client-configuration/
Contacting us
For all technical support queries, you can get hold of us with the following methods:
Telephone: 01 5255768
Ticket System: https://admin.register365.com/tech_support/tracking/


