How to set up a POP3 account on an Android device
This article will guide you through configuring your email on an Android device.
Tip: If you require further assistance setting up your emails then why not consider our new KickStarter service. For more information please contact our Sales team on 01 5255768.
Note: Register365 does not support third-party software or devices. For more information on Android, please visit http://www.android.com/.
The first step to set up your emails is to find and select Settings
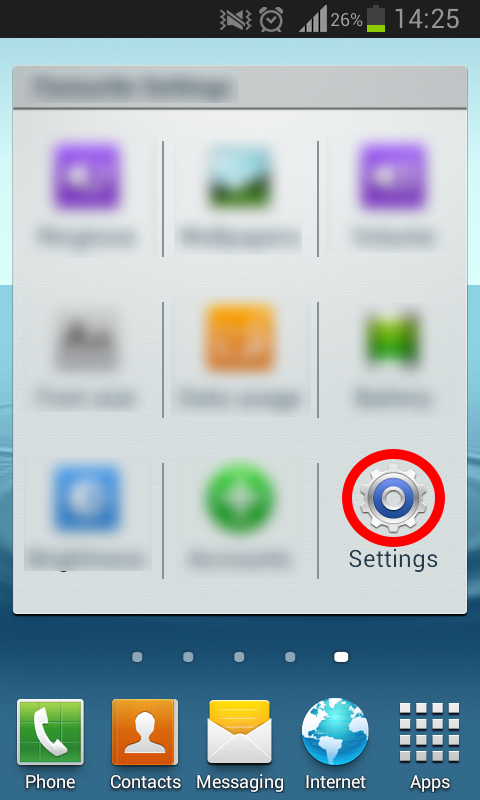
Info: Some Android devices may have a different symbol for Settings, so you will need to find the settings option on your device.
Next scroll down your Settings menu until you get to the Accounts section, at the bottom of the accounts section please select Add account

Now select the Email option to add a new Email account.

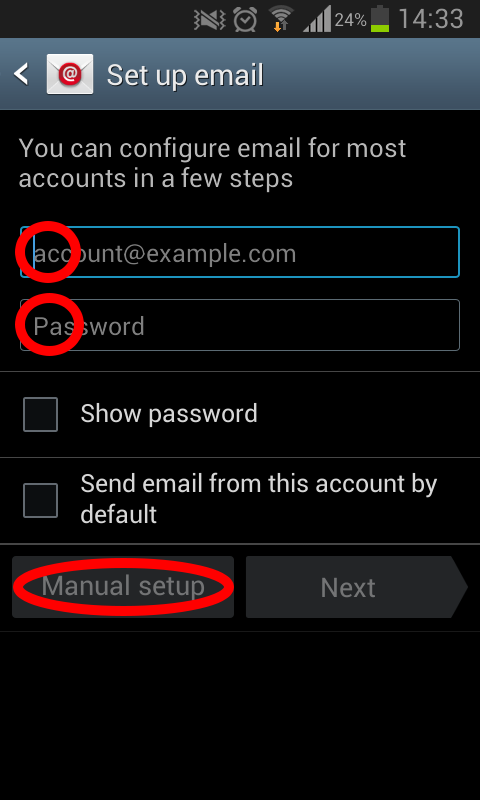
On the Set up an email page enter your email address and Password then select Manual setup
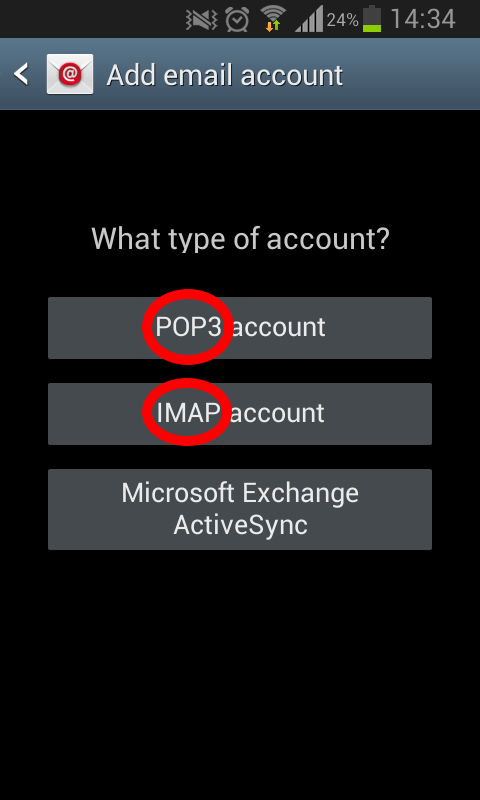
On the next screen select the type of account you are setting up, in this article we are setting up a POP account.
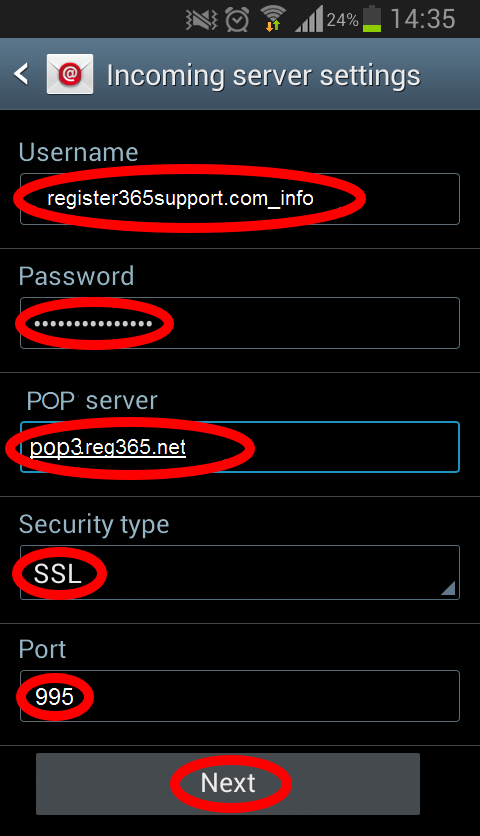
Next we need to enter our incoming server settings.
Your Username and Password are as you have set up in your Online Control Panel, if you are unsure of your Username and or Password please see this guide to reset your Password.
The other settings will be as follows:
- POP server – pop3.reg365.net
- Security type – SSL
- Port – 995
Once you have entered your details click Next
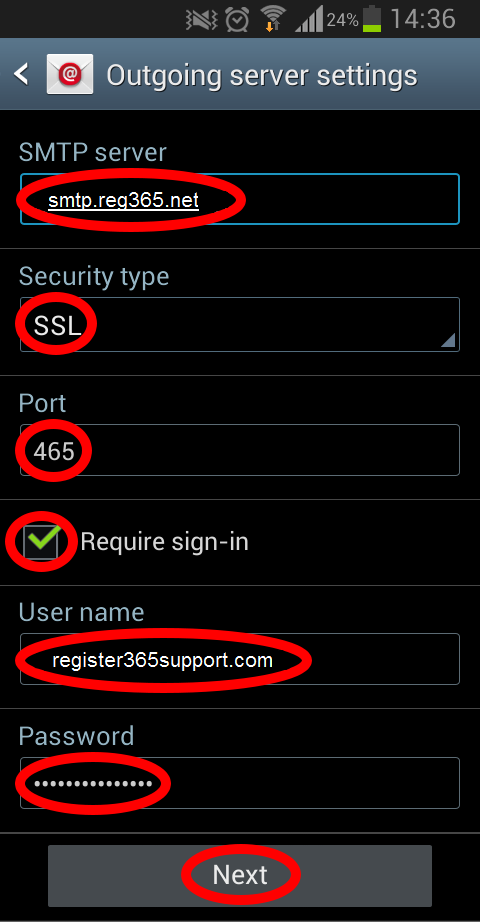
Now we need to enter the SMTP details, your SMTP server will be smtp.reg365.net only if you your have purchased Authenticated SMTP Access, if you need to purchase this product please contact our Sales team on 01 5255768.
The other settings will be as follows:
- Security type – SSL
- Port – 465
Tick the box Require sign-in then enter your User name and Password
Your Username and Password are as you have set up in your Online Control Panel, if you are unsure of your Username and or Password please see this guide to reset your SMTP Password.
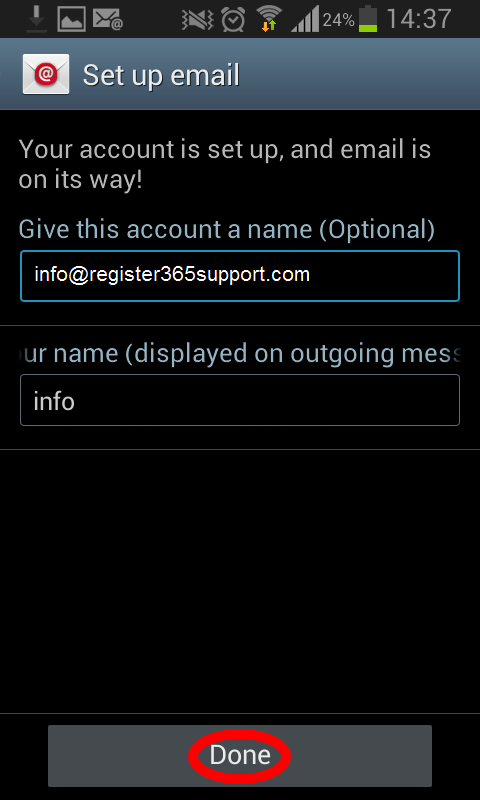
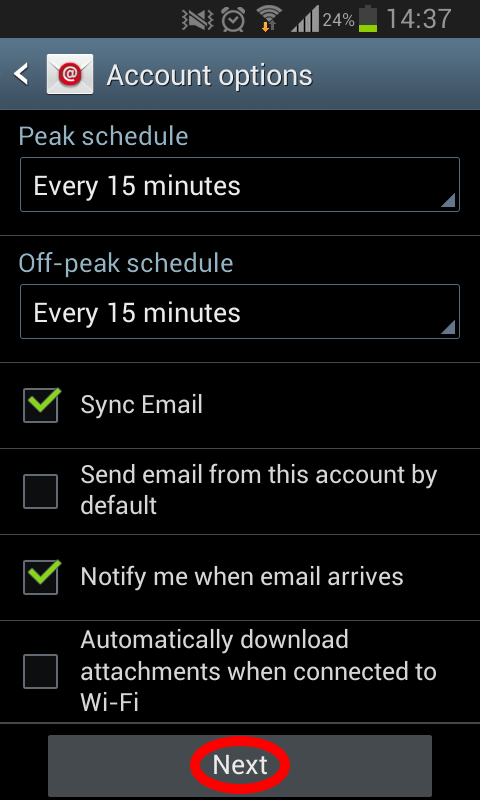
The next page of options are down to your personal preference, once you are happy with the settings click Next
Again the next page is down to your personal preference, once you are happy click Done to complete the setup.