

How to Setup an Exchange Account in Outlook 365
In this article, we will show you how to add an Exchange email account to Outlook 365 for Windows. Setting up your Exchange email account on Outlook 365 allows you to access and manage your email, calendar, contacts, and tasks directly from your desktop.
Getting Started
To get started, you first need to create a user in your Microsoft Admin area. Unsure how to do so? Follow our guide HERE.
If you have completed this already, we would also recommend you login to https://login.microsoftonline.com/ before starting the set up in Outlook 365 to check you have the correct login credentials.
If you need to do a password reset, you can do so via the Microsoft Admin area using this guide HERE.
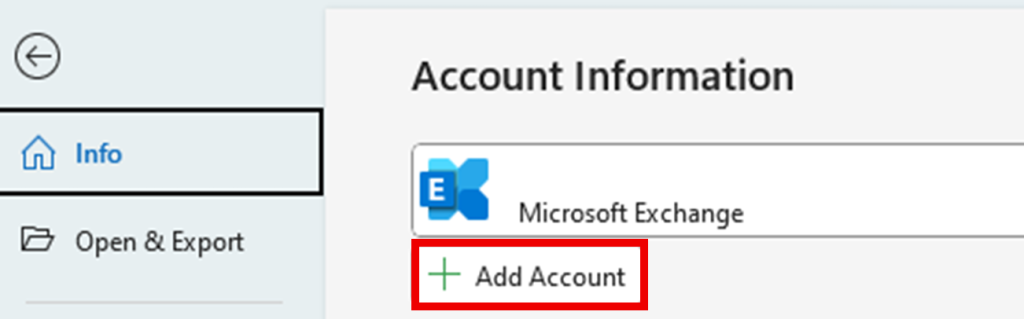
Step One
In your Outlook app, select the File tab.
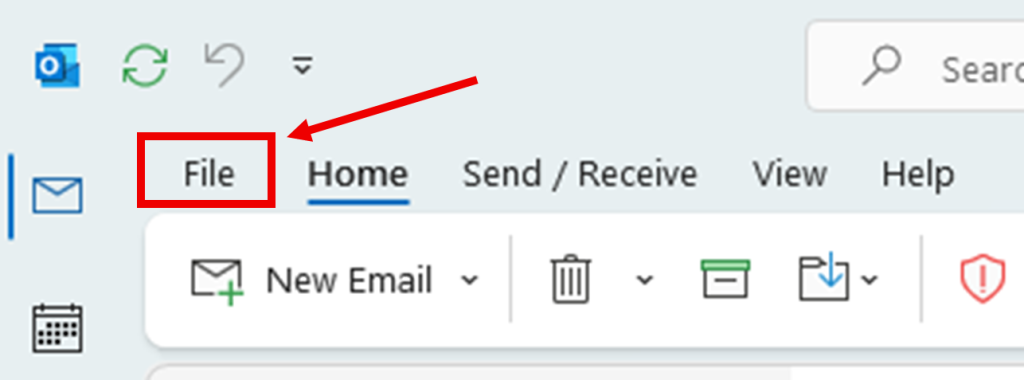
Once done, click + Add Account.
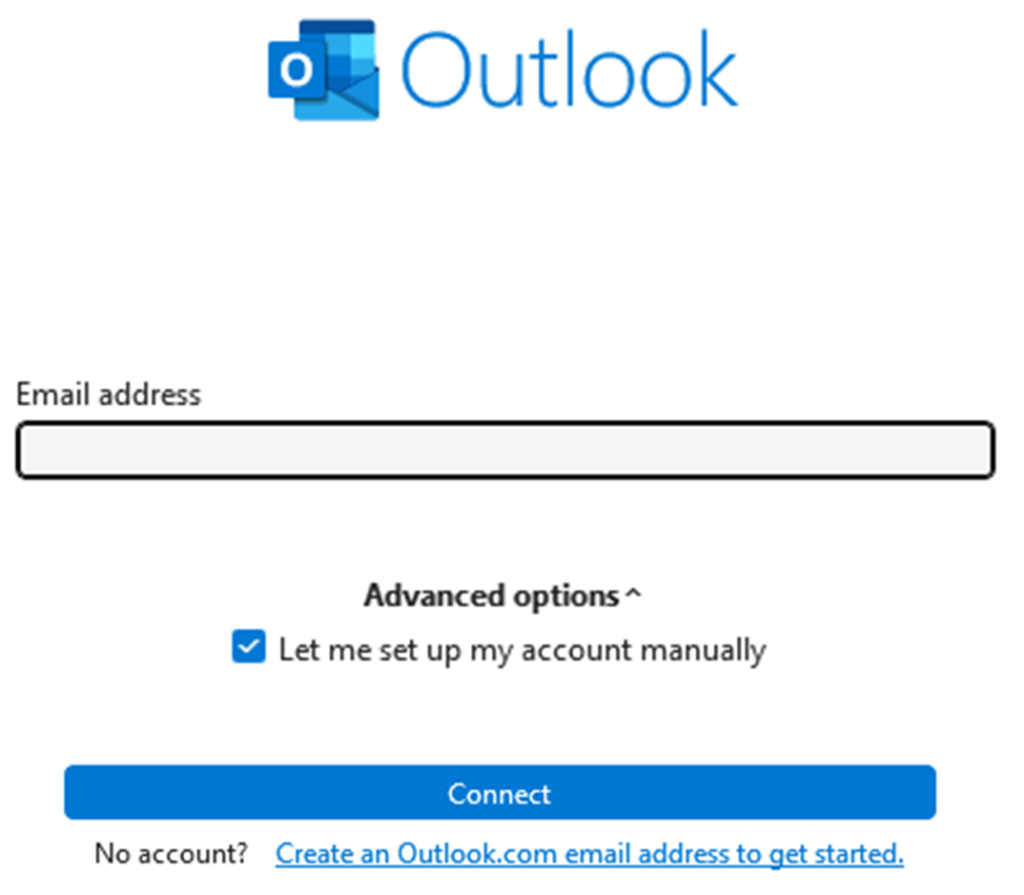
Step Two
In the box that appears, first enter the email address you want to add, then select Advanced options < Let me set up my account manually. To proceed, select Connect.
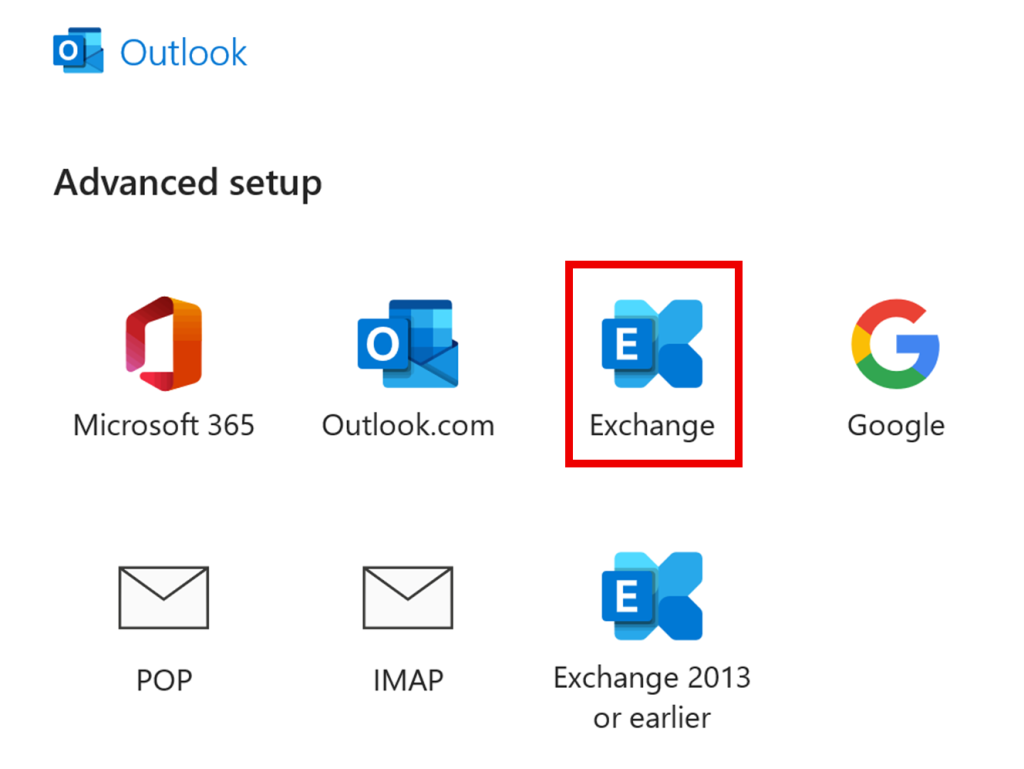
Step Three
You will now see several account type options, please select Exchange as the account type.
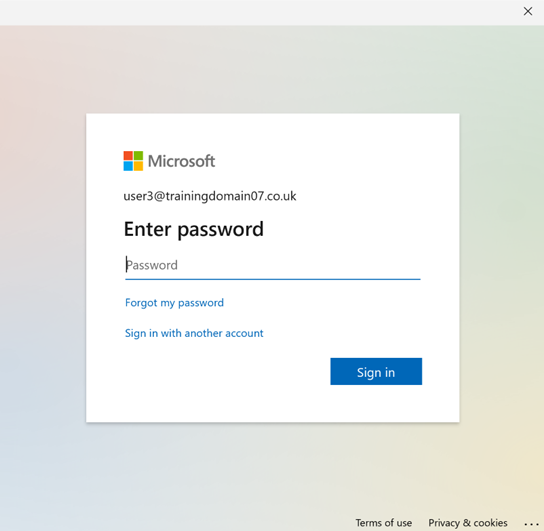
Step Four
In the box that appears, please enter your Password, then select Sign In.
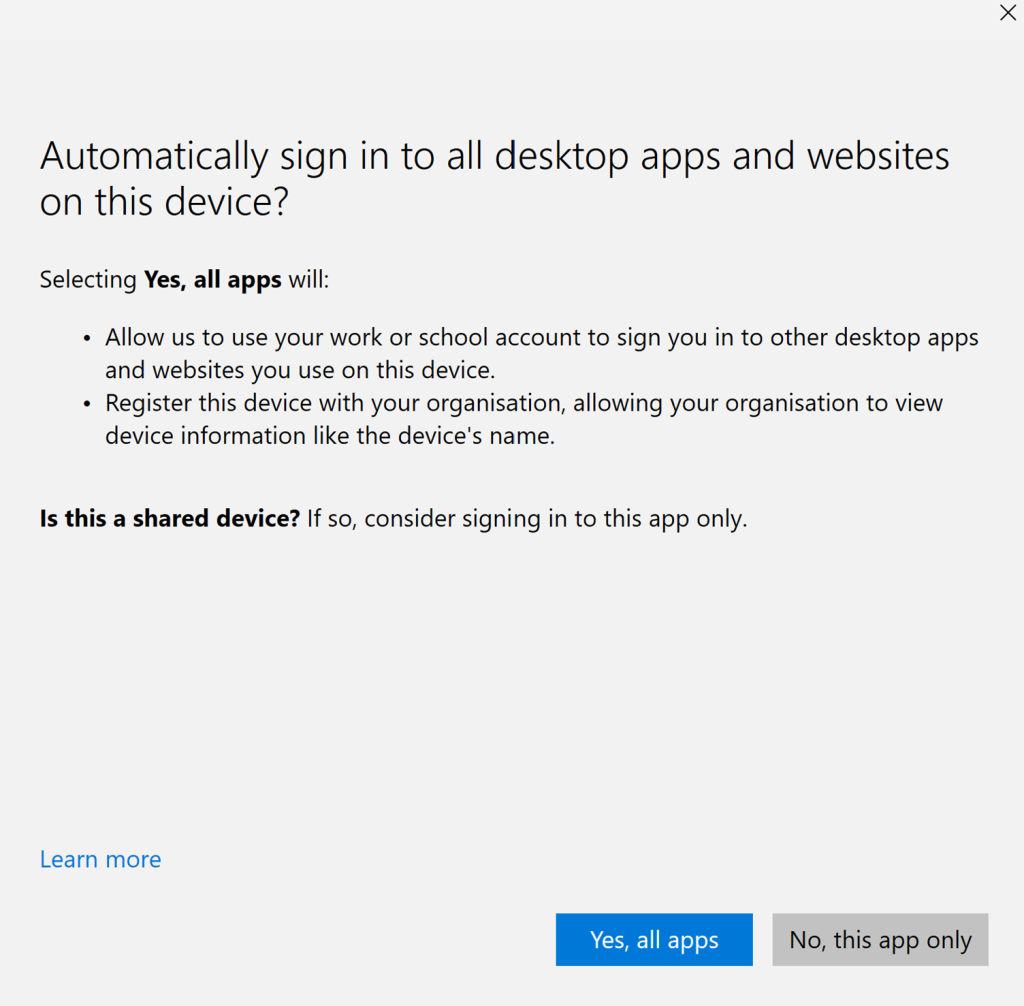
Step Five
Next, select your preference on whether to Automatically sign in to all desktop apps and websites on this device?
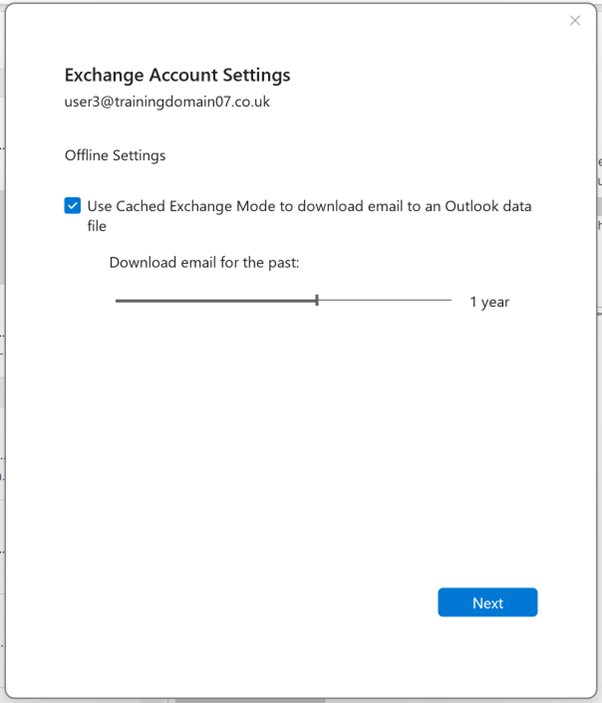
Step Six
Here, you can enable Use Cached Exchange Mode to download email to an Outlook data file, which saves your emails locally for quicker access and offline use.
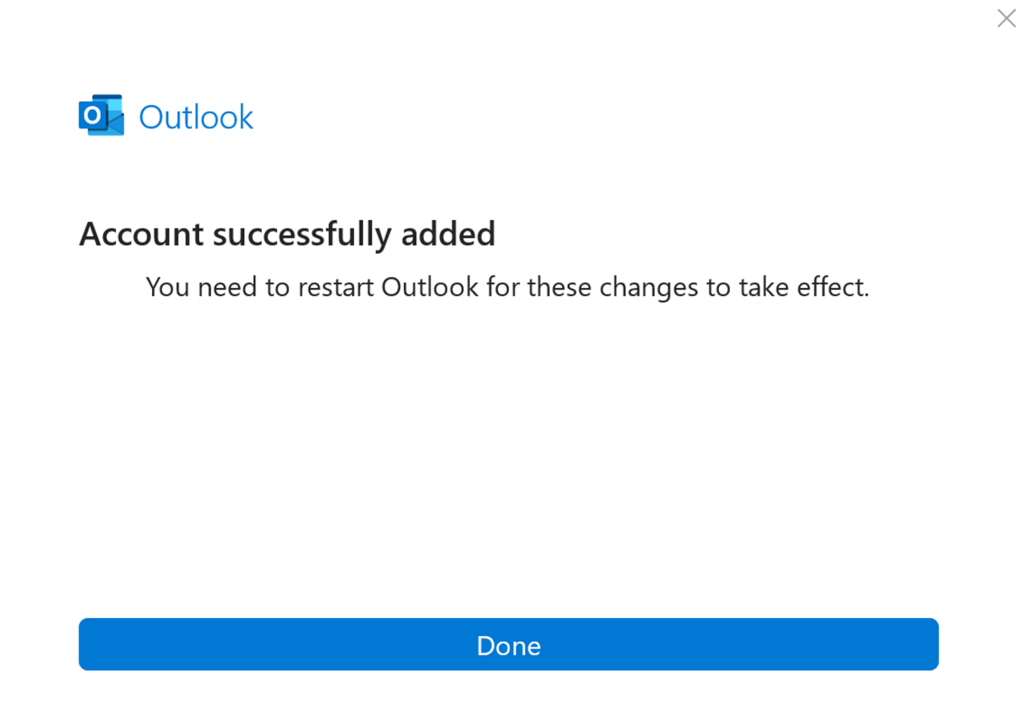
Step Seven
Finally, a pop-up box will appear stating Account successfully added. Select Done to complete the set up, then restart Outlook to confirm the changes.
If you have any further questions, simply raise a support request from within your Online Control Panel or call us on 01 5255768. Our Support team are here to help and ready to assist you with your enquiry.
For assistance raising a support request please follow the following guide.