

How to set up an IMAP account in Thunderbird
In this article, we will show you how to add an IMAP email account to Thunderbird. Setting up your email account using IMAP in Thunderbird allows you to sync messages across all your devices while keeping them stored on the mail server, meaning you can view your email directly on your desktop without logging into Webmail.
Getting Started
To get started, you first need to create a mailbox and email alias in your Control Panel. Unsure how to do so? Follow our guide HERE.
If you have completed this already, we would also recommend you login to Webmail before starting the set up in Thunderbird to check you have the correct login credentials. Please ensure you enter your full email address and password.
If you need to do a password reset, you can do so via the Control Panel using this guide HERE.
NOTE: To add your mailbox as an IMAP account in Thunderbird, you’ll need to ensure that Authenticated SMTP is active. If the package hasn’t already been activated, you can enable it through your Control Panel or contact our Sales team at 01 5255768.
Step One
TIP: Upon launching the Thunderbird application, you will be prompted to enter your credentials if you are adding an account for the first time. If this is the case, please proceed directly to Step Four of this guide.
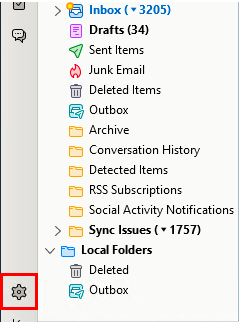
If an account has already been added to your Thunderbird application, you will need to navigate to the Add Account section. First, select the Settings icon in the bottom left of the screen.
Step Two
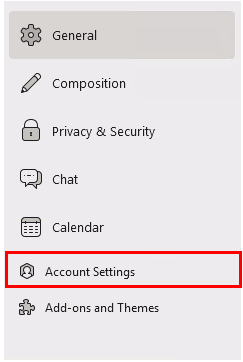
Once selected, you will be presented with the following options. Please select Account Settings.
Step Three
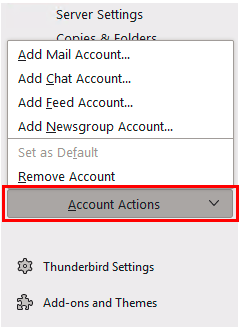
The option for Account Actions will now be presented to you. Once selected, an option for Add Mail Account will appear. Please select this option and you will be presented with the Add New Account screen.
Step Four
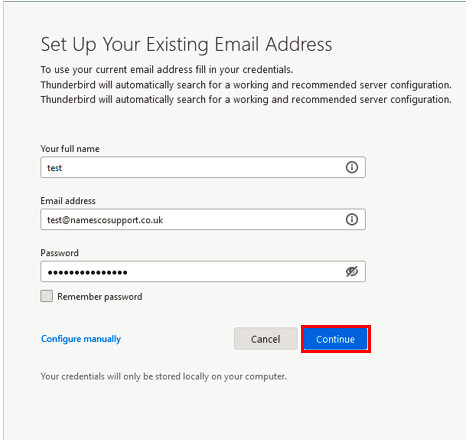
On the page you are taken to, you will need to enter your Full Name, your Email Address and Password.
Once completed, select Continue.
Step Five
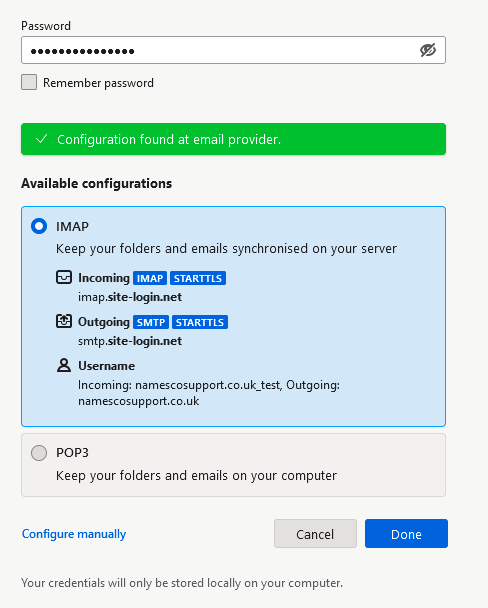
Thunderbird will then attempt to automatically detect your email configuration. Instead of selecting one of the auto-discovered settings, please select the option to Configure manually.
Step Six
In the box that appears, you will be asked to fill in all the necessary server information for your incoming and outgoing email.

Please enter the information as follows:
Incoming Server
- Hostname – imap.reg365.net
- Port – 993
- Connection Security – SSL/TLS
- Authentication Method – Normal Password
- Username – your email address (example@mydomain.ie)
Outgoing Server
- Hostname – smtp.reg365.net
- Port – 465
- Connection Security – SSL/TLS
- Authentication Method – Normal Password
- Username – your email address (example@mydomain.ie)
Select Re-test to confirm the details, then select Next to proceed.
Step Seven
If Thunderbird verifies that the settings are correct, the Done button will become active. Please select this button to complete the account setup process.
If you have any further questions, simply raise a support request from within your Online Control Panel or call us on 01 5255768. Our Support team are here to help and ready to assist you with your enquiry.
For assistance raising a support request please follow the following guide.